RESTful Web
Services
Creating
a RESTful Web Service
RESTful Web Service Properties
RESTful Web Service Configuration Panel
Request
Parameters and Headers
Testing the RESTful Web Service
Publishing a RESTful Web Service
See also: Publishing RESTful
Web Services Overview, Endpoint
Scripting, Server
Admin Web Service Administration, Publishing Web Service
Documentation, RESTful Web Service Tutorials
RESTful Web Service
The RESTful Web Service is
a collection of endpoints that determines the functionality that can be
executed. Normally all the endpoints within a service provide related
functionality; for example the service named customer might contain endpoints named: add, get, update and
delete.
A RESTful Web Service must
contain at least one endpoint and each endpoint can be configured with the
following information:
·
Endpoint URI that uniquely
identifies the resource
·
One Endpoint Event for each endpoint – this identifies the script(s) to
be run when a request is received
·
One On Error Event (optional) for each endpoint
·
At least one supported
operation e.g GET, POST, PUT etc…
A RESTful Web Service does
not have any user interaction and is run as a background process.
The incoming headers,
parameters and message body (request) can be accessed by the JavaScript API by calling the appropriate form.rest.getRequestXXX() method e.g form.rest.getRequestBody().
The outgoing message and or
headers (response) can be populated by calling the appropriate form.rest.setResponseXXX() method e.g form.rest.setResponseBody(JSON.stringify(customer).
Fields, Tables and
Resources can be added to the web service and these are used in the same way as
with forms.
A RESTful Web Service is published as a web service and is then invoked using the following URL:
http://<domain-name>:<port>/<web-app>/api
/<restful_service_name>/<endpoint-uri>
The documentation can be viewed by invoking:
http://<domain-name>:<port>/<web-app>/ebasePublishRest.eb?serviceName=<restful_service_name>
After a RESTful Web Service has been created, you can control its operation using the Server Administration Application - Configuring RESTful Web Services on the Server. This allows you to enable/disable the service and re-deploy it when changes have been made. It also allows you to control whether the documentation for the RESTful service is published, see RESTful Documentation for more information.
Creating a
RESTful Web Service
A RESTful Service can be
created by selecting New > REST
Services > Public REST Service and edited by double clicking on a
service name. This presents the RESTful Web Service Editor panel which is
similar to the Form Editor with the following
differences:
- The main panel is the RESTful Web Service
Configuration Panel where you configure the endpoint information for
the service.
- Only the Fields View,
Tables View, Resources
View and Properties View panels are
shown. The other panels are not required as a RESTful Web Service has no
pages.
- The toolbar has one additional item - click
 to display the RESTful Web Service
Documentation dropdown menu options:
to display the RESTful Web Service
Documentation dropdown menu options:
·
Click ![]() to edit the swagger
document that is published.
to edit the swagger
document that is published.
·
Click ![]() to launch an external browser that displays
the swagger document as a human readable HTML page for the service.
to launch an external browser that displays
the swagger document as a human readable HTML page for the service.
- The RESTful Web Service properties differ from
Form properties and are shown in the next section
The Gateway RESTful Web Service can be identified by the
icon ![]()
To qualify as a valid RESTful Service, a RESTful Web Service must contain at least one endpoint. The endpoint must have a unique URI associated to it. This determines the entry point to the web service.
RESTful
Web Service Properties
- Shared
Functions: Configure any scripts that contain
functions which are to be made available to all events at execution time.
See Shared
Functions for more details.
- Optimistic
Locking: See Optimistic
Locking property on Form Properties
RESTful Web Service Configuration Panel
The RESTful Web Services Configuration Panel is the central panel within the RESTful Web Service Editor. The left hand panel displays a tree structure.
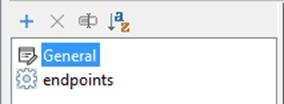
General
The General node shows the Base URI for the service without the endpoint URI.

Endpoints
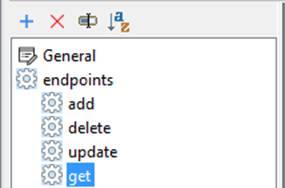
The endpoints node contains all the endpoints associated with the web service.
- Click
the
 icon to create a new endpoint.
 - Click
the
 icon to delete an endpoint.
 - Click
the
 icon to rename an endpoint.
 - Click
the
 icon to sort the endpoint names into
alphabetical order.
icon to sort the endpoint names into
alphabetical order.
Clicking the endpoint node displays the configuration properties for the endpoint.
Endpoint
An endpoint is the entry into the web service and each endpoint is defined by a unique URI. The endpoint properties allow you to configure the unique URI and the operation(s) that the endpoint supports e.g GET, POST.
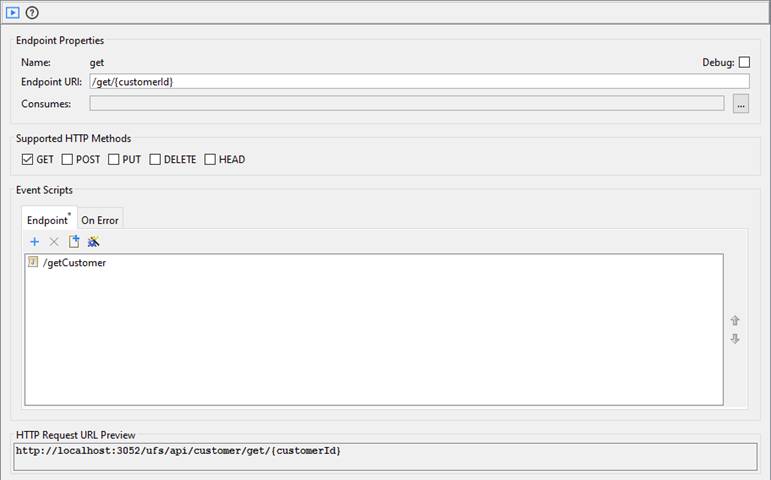
The endpoint URI is automatically configured with the name of the endpoint when the endpoint is added.
- Click
the
 icon to test the RESTful Web Service
 - Click
the
 icon to open the help to this document
Endpoint Properties
|
Property |
Description |
|
Name |
Displays the name of the endpoint. To rename the endpoint click
the |
|
This is the URI for the endpoint and forms part of the URL used by callers – see above. Path parameters can be specified by enclosing the name of the parameter in between { }, e.g {customerId}. These parameters are accessed using the JavaScript API at runtime. A URI can consist of multiple parts and contain more than one parameter. The URI has to be unique. When parameters form part of the URI all parameter names are treated as representing the same value at design time e.g /users/{username} is the same as /users/{userId} |
|
|
Consumes |
This identifies the mime types (e.g application/json, application/xml) that the endpoint accepts on the request body. If this property is not specified then all mime types are accepted into the system. This property has no default. At runtime the Content-Type request header is read and compared with this property. A HTTP status code of 415 (Media Not Supported) is returned if the Content-Type does not match one of the configured mime types. Click the |
|
Select the HTTP methods that the endpoint supports. An endpoint must have at least one HTTP method selected, but it can support more than one method. GET is selected as default when the endpoint is created. See HTTP Methods for more information. |
Event Scripts
- Endpoint event scripts: Add script(s) which are run when the endpoint
is invoked.
- On Error scripts: Add script(s) which are run when an error
occurs when processing the endpoint.
HTTP Request URL
Preview
This shows a preview of the full URI to the endpoint used by callers.
This is a concatenation of the Base URI and the endpoint URI - see above.
Request Parameters and Headers
Path parameters are parameters contained within the URL. These are the only parameters that are configured using the RESTful Web Services Configuration Panel.
Path parameters are added to the endpoint
URI using the syntax: {param-name}. An endpoint URI can have any
number of parameters included in the path. These parameters are substituted
with real values when the endpoint is invoked. Path parameters cannot be set to
a type and are all treated as character values. Path parameters are separated
by a /.
Examples of
endpoint URI’s are as follows:
|
Design time Endpoint URI |
Endpoint URI invoked at runtime |
|
/get/{customerId} |
/get/100012 |
|
/user/exist/{username} |
/user/exist/sid |
|
/browse/catagories/{userId}/tracks |
/browse/catagories/1234/tracks |
|
/browse/catagories/{userId}/tracks/{language} |
/browse/catagories/1234/tracks/US |
Path parameters can be read at runtime using for example form.rest.getPathParameter("customerId").
Query parameters and HTTP headers are not configured in the designer. Query parameters and HTTP headers can be accessed in the runtime event script using the RESTful web service API.
Testing the RESTful Web Service
Select the endpoint
that you would like to test then click the test ![]() icon on the toolbar.
icon on the toolbar.
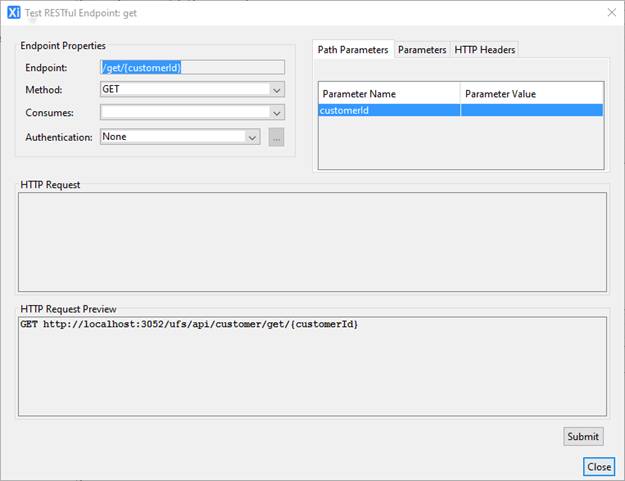
A dialog will open allowing you to configure all the attributes and parameters for the web service. The Endpoint field is read only and is for information purposes only.
The Path Parameters table is automatically populated with the path parameters from the endpoint URI. The Parameter Value is the only column that is editable in the Path Parameters table. It is not possible to add additional path parameters.
The HTTP Request Preview Panel is automatically updated as the values are entered into the appropriate fields and tables.
To test the web service:
1. Select the Method to test e.g GET, POST etc…
2. If applicable, select the content type for the request from the Consumes dropdown.
3. Enter the Parameter Value for each of the parameters in the Path Parameters table.
The HTTP Request field is enabled if the Method is set to POST or PUT, otherwise the HTTP Request field is disabled.
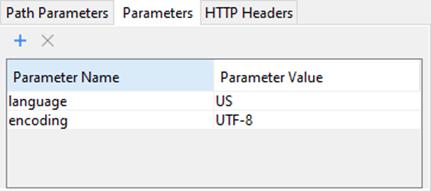
5. Add Query or Post Parameters
Query parameters are added to the end of the URL used to invoke the web service and are applicable for HTTP GET, DELETE and HEAD methods. For example:
http://localhost:3030/ebase/api/customer?id=12345&language=US
Post parameters are added to the Request Body as key value pairs and are applicable to HTTP POST and PUT methods. It is not possible to use the request body and the post parameters together. For example:
http://localhost:3030/ebase/api/customerid=12345&&language=US
Query and Post parameters are not configurable in the RESTful Web Services Configuration Panel.
Click the Parameters tab to add or remove parameters.
·
Click the ![]() icon to create a new parameter. Enter a name
and a value for the parameter.
icon to create a new parameter. Enter a name
and a value for the parameter.
·
Click the ![]() icon to delete a parameter
icon to delete a parameter
A parameter must have a valid name and value.
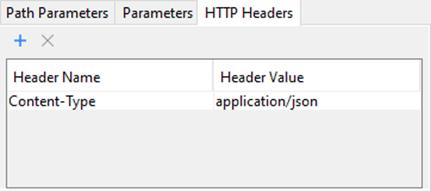
- Adding HTTP Headers
HTTP Headers are added to the HTTP request as key:value pairs. HTTP headers are applicable for all request methods. For example:
Content-Type: application/json
HTTP Headers are not configurable in the RESTful Web Services Configuration Panel.
Click the HTTP Headers tab to add or remove parameters.
·
Click the ![]() icon to create a new HTTP Header. Enter a name
and a value for the header.
icon to create a new HTTP Header. Enter a name
and a value for the header.
·
Click the ![]() icon to delete a HTTP Header
icon to delete a HTTP Header
A HTTP Header must have a valid name and value.
- Click the Submit button
- A dialog will pop up showing the HTTP response from the REST call.
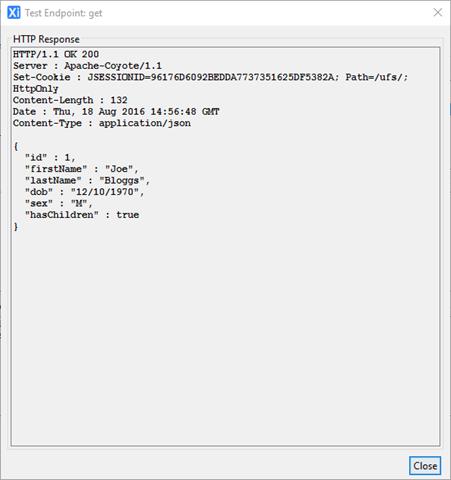
- Click close to close the HTTP Response dialog.
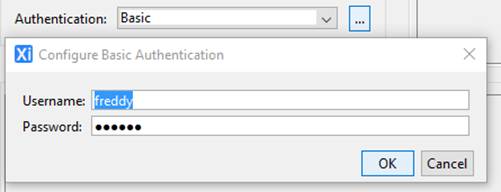
Testing Basic Authentication
The Authentication dropdown has two options:
- None – No authentication
- Basic
– Allows testing of Http Basic Authentication. This will add the username and password as an appropriate
header to the HTTP request headers. Click the
 button to enter a username and password.
The HTTP Request Preview panel shows a preview of the full RESTful Web Service URI, request headers and parameters that will be called with the path parameters substituted with their configured values. The panel is updated automatically whenever a value is modified.
Publishing a RESTful Web Service
A RESTful Web Service is published automatically and no specific action is needed. If required, a RESTful Web Service can be disabled or enabled using the Server Administration Application.
RESTful
Documentation
Ebase provides the
ability to publish documentation as Swagger JSON or YAML documents - click here for more information. RESTful
Web Service documentation is published automatically and no specific action is
needed. Publishing documentation can
be disabled and enabled using the Server Administration Application.