Integration Resource Wizard
Select Integration Service Fields For Documents Page
See also: Integration
Server, Integration Services, Integration
Resources
Introduction
The Integration Resource Wizard is invoked by clicking the ![]() icon on the Integration
Service toolbar and is used to create an Integration Resource from the
fields and tables within an Integration Service.
icon on the Integration
Service toolbar and is used to create an Integration Resource from the
fields and tables within an Integration Service.
The wizard lets you configure:
- Integration Resource Name
- Integration Adapter Name
- Integration Operation Name (used to define the web service operation)
- The namespace to associate to the Integration Schema
- The request document - fields and tables
- The response document - fields and tables
The Integration Resource created using the wizard is added automatically to the Resources View of the Integration Service.
Using the wizard
The example below shows creating the Employees Integration Resource with an operation getEmployees.
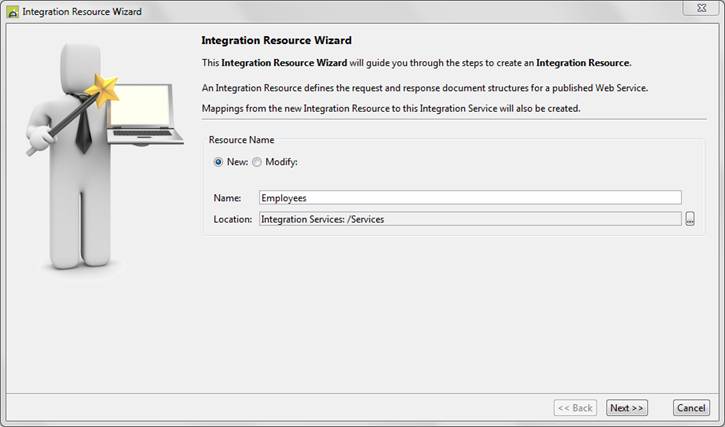
First Page
|
New/Modify |
Select New to
create a new resource, Modify to
change an existing resource |
|
Name |
Name of the new resource (for new resources) |
|
Select Resource |
Select an existing resource from the list (when modifying a resource) |
|
Location |
The workspace folder where the resource will be created.
Click the … button to browse. |
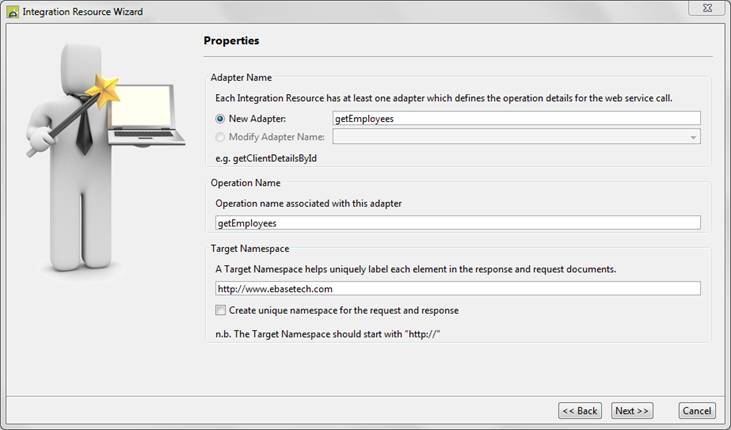
Properties Page
|
New Adapter |
Enter the
name of the adapter. This uniquely identifies the new adapter within the
resource and can be any name of your choice – typically this is the same name
as the operation name. |
|
Modify Adapter |
If
modifying an existing resource, select the adapter name from the list |
|
Operation Name |
Name of the operation – this will appear in the WSDL of
the published web service |
|
Target Namespace |
This is normally the name of the company or organisation publishing
the web service e.g. http://<your-company-web-address>. It can be any name that
conforms to the XML Namespaces
specification. |
|
Create unique
namespace for the request and response |
When checked, the namespaces used for the request and
response documents are adapted to ensure that they are unique. |
Select Integration Service Fields For Documents Page
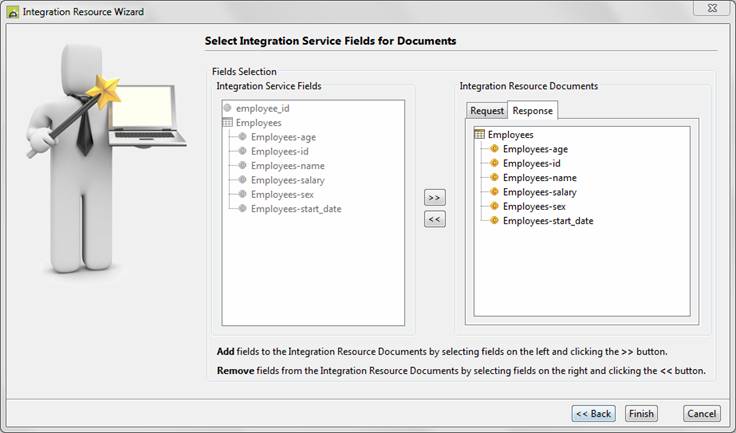
Use this
page to create the request and response documents. The left hand panel shows
all the fields and tables available within the Integration Service. The
right-hand panel shows the format of the request and response documents to be
created within the Integration Resource.
Select
either Request or Response
in the right-hand panel then select fields/tables from the left-hand
panel and use the >> and << buttons to transfer them to the
documents.
![]() Note that if a table is already mapped to another resource in the
Integration Service, it cannot be selected for inclusion within the request or
response document. The reason for this is that a table can only be mapped to a
single resource. If you are faced with this issue, the solution is to create a
second table in the Integration Service with the same structure as the first
table and select this new table in this wizard. You then need to copy data
between the two tables which you can do using the FPL copytable or Javascript tables.TABLENAME.copyTable() statements.
Note that if a table is already mapped to another resource in the
Integration Service, it cannot be selected for inclusion within the request or
response document. The reason for this is that a table can only be mapped to a
single resource. If you are faced with this issue, the solution is to create a
second table in the Integration Service with the same structure as the first
table and select this new table in this wizard. You then need to copy data
between the two tables which you can do using the FPL copytable or Javascript tables.TABLENAME.copyTable() statements.
Finish Button
Clicking the Finish button performs the following actions:
- Creates or modifies the Integration Resource
- Adds the Resource to the Resources View of the Integration Service (if it’s a new resource)
- Creates
the mappings between the Integration Service and the Resource (to see the
mappings, select the resource in the Resources View of the Integration
Service and click the mappings icon
 )
)
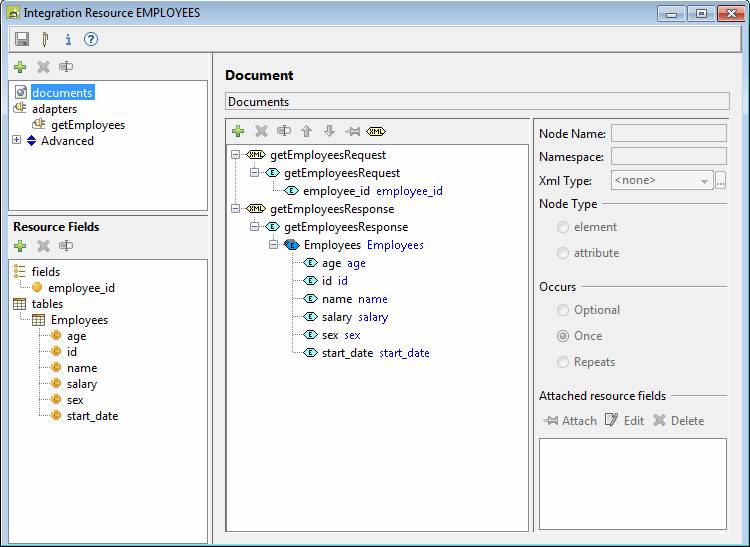
Here is the Employees resource created in the example above: